|
|
|
|
 |
Year after year we have destructive cyclones, typhoons and hurricianes; earthquakes, floods, bushfires and mudslides. All difficult situations for those who have to endure them and as always, the Red Cross is there on the ground helping those who really need it. For information on how you can assist either the Australian (or the International) Red Cross in maintaining their humanitarian operations, please visit the Australian Red Cross
website, or from within Australia, call 1800 811 700. |
|
|
|
|
|
| Other work by Peter Andrews |
|
|
 |
|
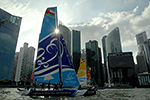
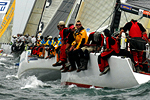
Extreme Sailing Series Singapore Day 2, Feb 7, 2015
by Peter Andrews. |
|
|
|
 |
|
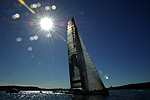
Sydney Hobart 2012 start
by Peter Andrews. |
|
|
|
 |
|
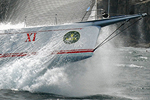
Big Boat Challenge 2012
by Peter Andrews. |
|
|
|
 |
|
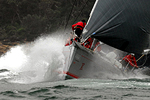
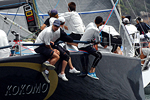
One Design Series,
Sydney, Dec 7, 2012
by Peter Andrews. |
|
|
|
 |
|
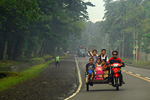
| Davao del Sur and Cotabato Provinces, Aug 2012. Assignment by Peter Andrews. |
|
|
|
 |
|
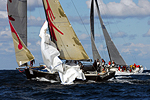
| Sydney - Gold
Coast. July 28, 2012. By Peter Andrews. |
|
|
|
 |
|
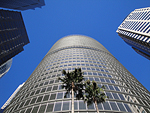
| Sunny Winter's Day, Wynyard Sydney, June 2012. Photos by Peter Andrews. |
|
|
|
 |
|
Sydney
Hobart 2011 start.
By Peter Andrews. |
|
|
|
 |
|
| Sydney - Gold
Coast. July 30, 2011. By Peter Andrews. |
|
|
|
 |
|
| Wakefield Circuit Club Day, Goulburn NSW, Apr 25, 2011 by Peter Andrews. |
|
|
|
|
| About the assignment. |
|
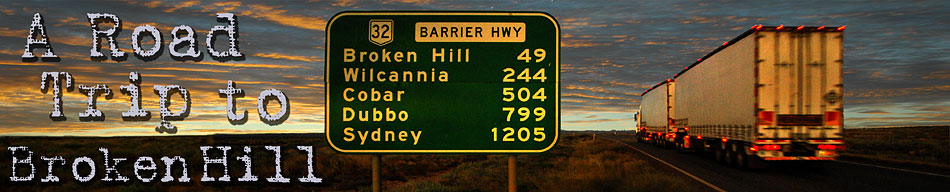
As an old friend had passed away in late April 2011 after a long illness, the brakes were suddenly applied to day-to-day life to attend a celebration of my old friend’s life. As he had lived in Broken Hill in far western New South Wales Australia, this was the place where I needed to be. It had been around 20 years or more since my last trip out to this inland region of the Australian continent and the options were to either fly, bus, drive or ride.
At short notice, riding my motorbike was not an option as it had been off the road for a quite while getting some maintenance. But even if it was quickly put back together, it couldn’t be expected to be fully reliable for such a trip to the outback. With a bit of time available to get there and a rare situation where the western New South Wales outback was lush with vegetation from recent rain, there would be plenty to see. So flying was also not an option and neither was a bus; no way! The only real option was to give the every-day drive, my old faithful car, a good service. After that all it needed was all my gear to be thrown into the back with a couple of jerry cans of fuel, a bit of camping and cooking gear, before hitting the road west to chase a sunset.
From the east coast just south of Sydney to a halfway point at Nyngan for the first day, the drive then continued beyond the Bogan River along the straight endless highway to Broken Hill for the second. While in Broken Hill for a weekend, a drive out to Silverton and another to the South Australian border town of Cockburn provided some wonderful moments to get some great photos; as with a later evening walk around the city of Broken Hill itself.
For the return trip home, the car was pointed towards Tooleybuc on the New South Wales side of the Murray River. On the way, a look at the junction of the Murray and Darling Rivers at Wentworth was followed with a bit of a drive through Victoria and Mildura. The following day, the Murrumbidgee River was kept to the left from Balranald to Hay and beyond to Narrandera. With the endless flat plains now far behind, the car continued east to Wagga Wagga to spend night with another good friend.
On the last day for the drive back to the coast, the first big blast of winter had rolled up from Antarctica and the temperature plunged at least 10 degrees. While trying to take a few photos in and around Gundagai, fine hail was blowing all around. From there, the rest was just freeway, but nature had put on a great show. |
|
|
|
Editor's Note (June 2015)
These previously hidden pages were prepared but not fully completed or linked to the site back in 2011 due to many other commitments, so it was quite a pleasant discovery to find them while reviewing the website for a planned overhaul. So before that overhaul happens, these pages really do need to finally see the light of day and here they are. Only the first 2 legs of the trip from the coast to Broken Hill have been completed for now. Photos from the rest of the trip are available on the Facebook page in dedicated photo albums and I hope to get them all up here sometime in the near future.
As for the brilliant car that provided the opportunity for this great journey, it's motor (after more than a year of challenging conditions) finally gave up with 314,000 km on the clock. After a well deserved rest in a garage since November 2014, it is now in a workshop in Sydney and it will hopefully soon be as good as new and ready to do it all again. Updates on the progress of the engine renewal will be posted here and on social media as they happen.
Clicking onto any of the photos below will take you to a page with ten photos and there are links to following pages at the bottom of each. Enjoy! |
|
|
|
|
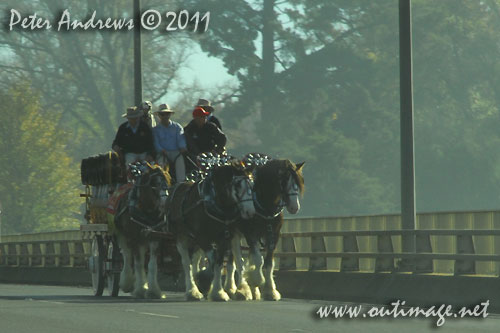
Rolling into Bathurst, NSW Australia during the lead-up to the Bathurst Show where a Clysdale Team.
Photo © Peter Andrews, Outimage Australia.
|
 |
|
| Leg 1 (Day 1) - From the coast to Nyngan: Page 1. |
| |
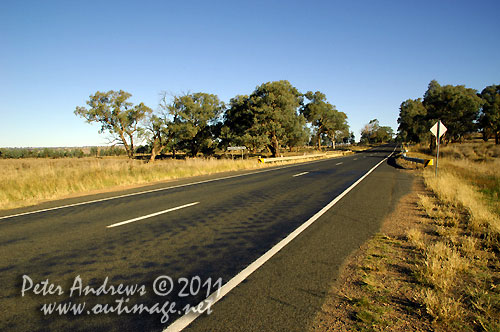
Along the Mitchell Highway, just outside of Wellington, NSW Australia.
Photo © Peter Andrews, Outimage Australia.
|
 |
|
| Leg 1 (Day 1) - From the coast to Nyngan: Page 2. |
| |
Nyngan, NSW Australia.
Photo © Peter Andrews, Outimage Australia.
|
 |
|
| Leg 2 (Day 2) Nyngan and the Bogan River to Broken Hill: Page 1. |
| |
Cobar, NSW Australia.
Photo © Peter Andrews, Outimage Australia.
|
 |
|
| Leg 2 (Day 2) Nyngan and the Bogan River to Broken Hill: Page 2. |
| |
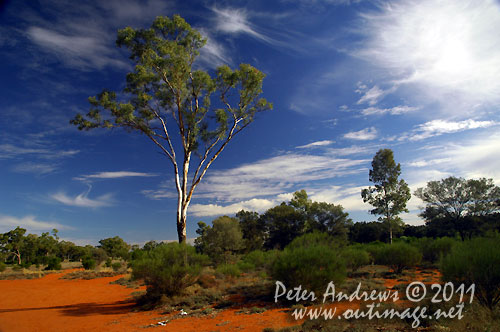
Taking a break from the Barrier Highway to take in the amazing colours of the Australian outback. At a roadside rest area between Cobar and
Wilicannia, NSW Australia.
Photo © Peter Andrews, Outimage Australia.
|
 |
|
| Leg 2 (Day 2) Nyngan and the Bogan River to Broken Hill: Page 3. |
| |
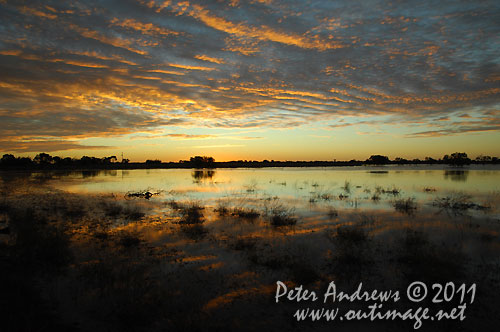
Sunset near the Little Topar Roadhouse, between Wilcannia and Broken Hill on the Barrier Highway, NSW Australia.
Photo © Peter Andrews, Outimage Australia.
|
 |
|
| Leg 2 (Day 2) Nyngan and the Bogan River to Broken Hill: Page 4. |
|
| Peter Andrews and Outimage © 2011 |
|
|
|
|
|